HAIR COLOURING: Options, Pros and Cons

cream of nature colourHello ladies

I follow a lot of natural haired bloggers and I will be the first to admit that I am in love with colours they can get away with. Because my hair is already chemically processed with a relaxer, adding a further chemical process via a dye job isn’t really advisable.
Does this mean that relaxed ladies can never experiment with colour?  No, the good news is that we can, however there may be limits to the range of colours we can wear if we want to minimise damage.

In this blog post I will set out the common methods of hair colouring as well as the pros and cons of each. So ladies if you’ve been thinking about colouring your hair this post should guide you on which type of colour you should go for.


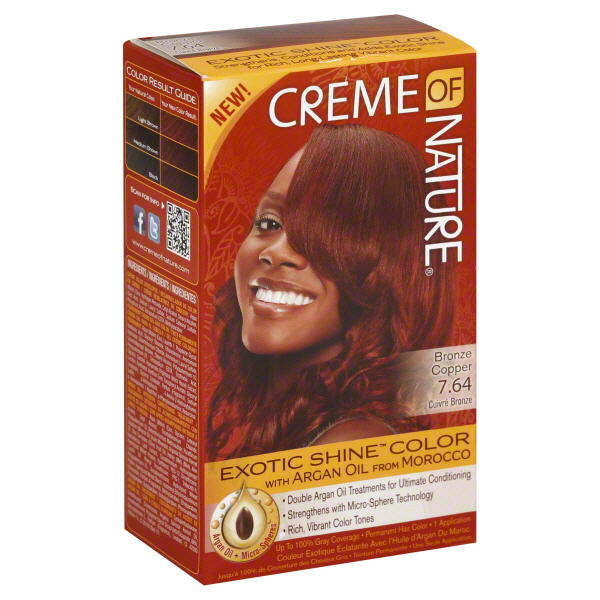
Permanent Hair Colours

Chemical hair dye kits are easily found in supermarkets. These chemical “do it yourself” hair colours usually contains ammonia or hydrogen peroxide.

How It works
The chemicals lift up the cuticle layer of the hair fibre which allows the dye to gain access to and deposit colour pigments into the inner section of the hair (the cortex ).

Pros of Permanent Hair Dyes

  • It is permanent. The colour may fade a little over time however it will not wash out entirely.
  • A wide range of colours are available.
  • It covers grey hair quite well.

Cons of Permanent Hair Dyes

  • Permanent colours weaken hair fibre because the cuticle layer must be breached. This breach in the cuticle layer occurs when the chemical breaks down some of the hairs protein thereby resulting in weaker hair.
  • The damage to the cuticles also means that the hair will NOT retain moisture as well as it did in its natural state. The hair will feel drier and rougher than it would in its natural state. It also has a higher risk of breakage.
  • For ladies who want to achieve tones or shades much lighter than their natural hair colour their hair may have to be chemically bleached before it is coloured.
    This double dose of chemical can be more than some ladies hair can tolerate especially if they are already have relaxed hair. ladies whose hair is natural are usually able to tolerate the bleaching and colouring process however a lot of deep conditioning will be required to fight dryness and breakage.  Ladies with natural hair tend to fare better with permanent hair colours but even they will have to stay on top of their deep conditioning.


Temporary Hair Colours

temp colour - Copy 3

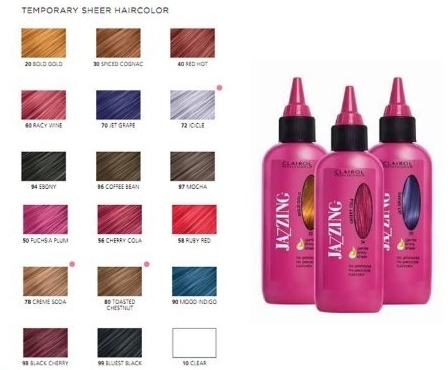
Rinses are also known as semi permanent hair colours.   These types of colours are also relatively easy to find in supermarkets and beauty supply stores.

How It Works

Rinses work by depositing the colour molecules on top of the hairs cuticles. These do not contain ammonia and generally do not lift up or breach the cuticles. The colour basically coats each hair fibre or strand.

Pros of Temporary Hair Colours

  • It is not as harsh as permanent hair colours and does not breakdown our hairs internal structure.
  • Because the molecules sits on top of or coats each strand of hair it makes each temporarily thicker. This is ideal for ladies who would like fuller/thicker looking hair even though it is temporary.
  • It is relatively safe for ladies whose hair is relaxed/texlaxed.

Cons of Temporary Hair Colours

  • Limited colours: although rinses are available in a wide spectrum of colours, they can only make your hair darker or richer than its original shade. So if you would like to change your hair from black to honey blonde then a rinse isn’t going to get you there. Rinses can leave dark hair with a bit of a tint which may be obvious when you are in sunlight so it is still worth a try if you are interested in experimenting with colour.
  • The colours tend to fade quite quickly and tend to last for up to 6 washes.  for some ladies the effects only lasts for a couple of washes.
  • It does not cover gray hair as well or as long as permanent colours.


Instant Hair Colours – Sprays and chalks

hair chalk


How It Works
The colour molecules of sprays and chalks sit on top of hair fibres and can be shampooed out

Pros of Instant Hair Colours

  • Available in a wide range of colours
  • It washes out so you can change things up as often as you like
  • It does not break down the protein structure of our hair fibres
  • It can be used on relaxed hair

Cons of Instant Hair Colours

  • It can be extremely drying so a good deep condition after washing out the colour will be beneficial.
  • It can be messy and the colours of some brands may stick to your hands every time you touch your hair.
  • The colour chalks often requires heat via a hair straightener to set the colour. This increases the risk of heat damage and dryness. Personally I don’t think I’d want to “bake” colour to my hair.

There are also all natural hair colour options which are safe for both natural and relaxed hair. I thought it was best to address those in a separate blog post. Personally I don’t have any colours in my hair but maybe I’ll try a rinse someday. Have you tried or would you like to colour your hair? What option do you think you might go for?

For anyone who is considering hair colour, as always I hope this post has helped you in some way.


Happy hair journey

X

Lade

Learn | Change | Grow


A BRIEF GUIDE FOR TRANSITIONING

Hello ladies


There are more and more of us going back to our natural hair texture.
Going natural is something I support and encourage whole heartedly even though I choose to remain texlaxed.  In my attempt to cater to black hair in all it forms I realised that I needed to pay ladies  who are transitioning some attention.

This blog post will not tell you all you need to know about transitioning…I’ll need a few thousand words to set that out.  This post will highlight  the changes you should expect in your hair as you embark on your transition and give tips that will help you manage your hair during your transition.
Although I am texlaxed and have no intention to transition to natural hair, I have stretched my relaxers for up to 6 months on several occasions so I do have  some experience of how hair changes in the early stages of a transition.

Hairducation 6 months stretch

My hair on one of my 6 month stretches

Three main areas  ladies who are transitioning need to be prepared for are:

1)      How your hair changes over the length of your transition

2)      Hair styling during your transition and

3)      Moisture and protein balancing for transitioning hair


Weeks 0 to 10 (Two and Half Months Post)

Hair Texture Changes
This stage of a transition is usually the easiest because you will be on familiar ground.  You hair is still predominantly relaxed or texlaxed.   Some new growth will begin to appear however the difference in texture will not be too difficult to manage.

Hair Style Options
You can wear the styles that you normally would, i.e., buns, roller sets and blending it with weaves will be easy , etc.

Moisture- Protein Balance
Relaxed hair needs protein strengthening more regularly than natural hair.  Many ladies will stick to using protein deep conditioner once or twice a month as this stage.


Weeks 10 to 16 (Four Months Post)

Hair Texture Changes
From 10 onwards your new growth will be quite apparent and managing the difference in textures ( natural new growth and relaxed length) should be your focus.  You have to alter your regimen and have a plan on how you will care for both textures.

The difference in textures can lead to a lot of tangling and your hair might begin to feel really dry especially at the roots.  You will need to detangle your hair more regularly working in smaller sections and increase how regularly you moisturise and seal your hair.

Trimming regularly from this point on your transition can be of great help because ends that are aligned or even tend to tangle less.  This will therefore make your transition more manageable.

 
Hair Style Options
What I always tell ladies who are transitioning or on a long stretch is that you cannot expect hair that has months of new growth to look, feel or behave freshly relaxed hair.

Wearing sleek styles will become more difficult to achieve using the same methods as you did when your hair has no new growth.    Daily combing should be avoided.  It is important at this stage to master finger detangling your hair regularly.  Combing your hair should only be done after thorough finger detangling
Also natural hair is best manipulated when it is damp. At this stage of transitioning, misting or moisturising your new growth before styling will help make your natural new growth more flexible and easier to style.

It is better that you embrace the natural new growth and begin to get used to how it feels and working with it.  Do not try to make the new growth look like relaxed hair by using straightening irons regularly.  The last thing you want to do is end up with heat damaged hair when you eventually big chop.

Styles which help many people get through transitioning are twists outs, braid outs, perm rod sets, straw sets and roller sets.  I call these camouflage styles because they disguise the difference in textures quite well.
Some ladies prefer to begin wearing long term protective styles at this stage such as weaves, braids and wigs as they cut out the need for daily manipulation.

 
Moisture and Protein Balance
Getting your moisture and protein balance right at this stage may become a little more complicated because your new growth needs something different from your relaxed ends.  Your new growth will need moisture deep conditioning regularly and protein deep conditioners occasionally.  Your relaxed length on the other hand will need protein more regularly than your new growth however it will still need moisture conditioning.

A way to achieve balance is to apply moisture deep conditioners to your new growth and to give your relaxed length what it needs at the time ( ie it could be protein one week and then moisture for the following two weeks for example)
Remember that the natural new growth will need protein deep conditioning occasionally, ie once every 4 to 8 weeks


.
Weeks 16 to 24 (six months post) and Beyond

Hair Texture Changes
At 6 months post your new growth will begin to dominate your relaxed length, It will look thicker and feel stronger than your relaxed length.  Your relaxed length may begin to “look” like it is badly damaged in comparison to your natural new growth especially when it is wet. The
The battle between the two textures will also have intensified and caring for your hair may require more time to minimise breakage at the line of demarcation (where the natural roots and relaxed length meet).
Working in section will become mandatory at this stage and many ladies transitioning find washing in braids may help reduce (not eliminate) tangling.
Remember that regular trimming will help reduce the degree of tangling you experience.


Hair Styling Options
Wigs, braids, twists, crotchet braids and a whole host of long term protective styles may be your best bet at this stage.  It is important that you continue to care for your hair and have a regimen for your hair when wearing extensions.

It is also important that you have breaks in between wearing extensions to give your scalp and hair a chance to recuperate and more importantly for you to familiarise yourself with your natural texture.
Although you will never really know how your natural texture will behave and look like until after your big chop, getting used to how it  feels and how to style it will hopefully prepare you for managing and styling your hair post big chop.

When wearing your own hair out this deep into your transition it is best to wear the camouflage styles that have been mentioned above.


Moisture- Protein Balance
By this stage in your transition you should continue deep condition each texture on your head separately, i.e. use moisture deep conditioners regularly on your new growth and give your relaxed length what it needs at the time ( protein or moisture)

Please note that this method should also be followed when applying your leave-in conditioning products.


Make no mistake transitioning can be quite challenging for ladies especially those who are new to hair care and are still trying to find a regimen that works well for them.  As the months of your transition go by try to have a plan or fixed date for when you plan to big chop.  Having a goal date can help to keep you motivated on your transition.

I hope this brief guide serves its purpose and is helpful to both ladies who are transitioning and those on a long stretch.  Is anyone transitioning or currently on a long stretch?  What do you find most challenging and what methods work well to help you manage your hair?

X


Lade

Learn| Change | Grow


Caring For Your Wig

Hello ladies

This is a very short impromptu post about wig care.
The majority of the time I tend to emphasise caring for our own hair when wearing wigs but the fact is our wigs need love too.  I was washing my Nazuri Curls wig and thought it would be a good time to share how I care for my wigs.

Wash and Conditioning

Wigs should be cleaned and conditioned regularly to help preserve the hair fibres and to keep the wig looking good for longer.  No one wants a brittle and dry looking wig.  A sulfate free shampoo should be used  to wash the wig and this can be followed by a light weight instant conditioner.  If I am wearing a wig regularly I wash it every 2 to 3 weeks.


How I Wash and Condition My Wigs

Wig Wash


  • Detangle thoroughly
  • Saturate the wig with room temperature water.  Keep the wig hanging straight down as seen in the pictures   above or lay it flat in a tub of water.
  • Apply shampoo to the wig and gently squeeze the lather through the length of the wig.  Avoid twisting or scrunching the wig
  • Rinse thoroughly and apply light weight moisture conditioner
  • Leave the conditioner on for a few minutes and then rinse thoroughly without twisting or roughing up the wig
  • A very light leave in conditioner can be applied depending on the hair type and your own preferences.  I only apply leave in conditioners to wigs that have a tendency to become frizzy and I make sure the products I use are non greasy or sticky.
  • Air dry, blow dry or roller set.  If styling with heat ensure you use a heat protectant.
IMG_8403

My wig made with Nazuri Curls hair extensions. After washing, I used 9 bendy rollers, let it dry and voilà….hello lushness 🙂

And there it is.  A quick and straight to the point post about wig care.

I am having such a hectic week and I am struggling to find time to wash my hair so I can come back to you with my hair update post. Fingers crossed it I’ll do it tomorrow (I am trying to stop procrastinating….honest)

Come back soon and happy independence day to my fellow Nigerians.

X

Lade
Learn | Change | Grow

Differences Between Natural and Relaxed Hair Regimens

relaxed and natural

Hello ladies,

I know this post was supposed to be a hair styling post however I made a little mistake when creating the styles so I decided to write this post instead.

I usually get ideas of what posts to write from the questions I get asked regularly.  One question I have been asked often over the years is whether  the advice on Hairducation applies to ladies who are natural or if I have special advice for natural hair.
Majority of the advice Hairducation does apply to natural hair ladies.  Regular cleansing, conditioning, moisturising and sealing and protective styling are practices that help black hair thrive irrespective of whether you are natural or relaxed.  Clearly posts about relaxing and texlaxing may not apply however other posts such as how to care for hair in extensions applies to both natural and relaxed ladies.

There are however some aspects  of hair regimens  that have to be fine tuned or adjusted based on whether your hair is natural or relaxed/texlaxed.  I have set out the main aspects to be noted below and I hope you find helpful.


Deep Conditioning – Protein and Moisture Balance

Black hair needs protein deep conditioning for strength and moisture deep conditioning for softness and elasticity.  If you are new to hair journeys and don’t know protein and moisture deep conditioning and how to use them please see this post.  I guarantee you’ll be glad you did.

For Relaxed/ Texlaxed Ladies
Protein deep conditioning should be done at least once or twice a month because the chemicals in the relaxer would have broken down your hairs natural protein making it weaker.   You therefore have to boost our hairs strength by completing a protein deep conditioner regularly.

For Natural Ladies
Your hair will have most of its natural protein structure intact however daily wear and tear, occasional use of heat and age of the hair fibres will lead to some damage and weakness of your hair so protein deep conditioning should still be completed.
The difference is that natural ladies do not need to use protein conditioners as often as relaxed heads.  If you are natural you should use protein deep conditioners every 4 to 8 weeks depending on your hairs need for it.   Just as a guide, some natural ladies use protein deep conditioners once a month and moisture deep conditioners 3 times a month.


The Weight Of Your Products

I have to emphasise that many naturals and relaxed ladies use the same products for leave-in conditioning and daily moisturising.  However when choosing your leave-in conditioners, daily moisturisers and oils for sealing, you should have some consideration for your hair type when deciding which products to use.

For relaxed ladies
Most relaxed ladies hair works well with lighter products which will not weigh it down.  Lotions and hair mists/sprays and popular with relaxed ladies. Light oils like coconut oil or medium weight oils like olive or almond oils are commonly used for sealing.

For natural ladies
Generally, natural haired ladies, especially those with very thick hair strands and full hair tend to use products that are thicker or heavier than those used by relaxed ladies.   Creams or thicker lotions may work better as leave-in conditioners and daily moisturisers for ladies with natural hair.  Many prefer to seal with hair butters like shea butter.
Please do exercise discretion and always be guided by what your hair needs when selecting your products, for example some natural ladies with very fine or thin hair may find that lightweight lotions and oils popular with relaxed hair ladies works best for them.


Manipulation – Combing and Styling

Black hair whether relaxed or natural should never be combed or styled when it is extremely dry and brittle as this will lead to breakage.  Hair should only be combed and styled only if it is well moisturised.

For Natural Ladies
A point to be noted is that natural hair is more flexible and easier to manipulate when it is damp.  Many natural ladies tend to spray their hair with a little water or liquid hair spray or hair mist before they manipulate their hair.
Manipulating in sections is also very beneficial to natural hair, trying to pull a comb through your hair as a single unit is a big no no.


The points above are some of the key differences between natural and relaxed hair regimens.  As I mentioned earlier in the post please note that the advice is general, you can experiment with some of the suggestions but always see how your hair reacts and then take it from there.

I hope you have enjoyed this post.  My next post will be the style post  I promised as well as a hair update post.  It’s been quite a while since I did one of those so come back soon to see how my hair has been holding up.

Happy Hair Journey

X

Lade

Learn | Change | Grow

How To Buy Hair Products: Oils

grapeseed-oil

One of the items we begin to value and use a lot more at the beginnings of our hair journey is oils and butters.  Before my hair journey I never ever sealed my hair. I knew natural oils were good for our hair but didn’t use them on my hair.
I realised soon after starting Hairducation that some readers get a little confused about what types of oils and butter they should use.
I have written a post about oils on a hair journey which you can read here but this post will share a little more information and give a lot of good tips for buying oils for use on your hair journey.

In this post I will discuss the types of oils needed on a hair journey, how to use them, the best places to find them and what to look out for when buying them. Enjoy


Types of Oils Needed On A Hair Journey

Petroleum and mineral oils are common examples of synthetic oils.  These are okay when used as a sealant however they can’t be absorbed by hair and scalp.  It is therefore always better to use natural oils on a hair journey.
There are two main types of natural oils used on a hair journey, carrier oils and essential oils.

Carrier Oils and Butters
Natural carrier oils contains so many nutrients and vitamins which work very well on our hair and scalp and have so many uses on a hair journey. They are usually obtained from the fruit, nuts, seeds or kernels of plants.  Carrier oils commonly used on a hair journeys include
Olive, coconut, Jamaican black castor, almond, argan, avocado, grapeseed oils and shea butter.  Some ladies also use ayurvedic oils like Amla and Bhringraj oils

Essential Oils
Essential oils are optional on a hair journey.  They are not used for sealing. Many essential oils have anti bacterial and antifungal properties; they can also be very relaxing and refreshing and help to stimulate hair growth.  They are very potent or strong and must be diluted with carrier oils before use.  They should not be used by pregnant ladies without first consulting with your doctor.


How to Use Oils On A Hair Journey
 

Oils can be used  in the following ways

  • Pre-pooing
  • To seal in moisture ( essential oils should not be used to seal)
  • Can be mixed into conditioners
  • Can be used for scalp massages
  • As a lubricant to help with detangling
  • Some carrier oils like coconut oil are great for boosting shine
  • Can be mixed into relaxers for texlaxing ( essential oils should NEVER be mixed in with relaxers or used in the final week before relaxing or texlaxing)


Where To Buy Oils

Supermarket
Carrier oils are usually best sourced in your supermarket aisles because so many of them are used for cooking. Most supermarkets will have extra virgin cold pressed oils like olive oil and grapeseed oil on their shelves.  Look for them in the food aisles not in the hair and skin aisles.

Local Markets
For ladies in Nigeria and Africa in general most local markets will have butters like Shea butter or coconut oil available for purchase.

Healthy Food Stores
These are also a good place to find oils, butters and essential oils.  Most carry an impressive range of oils.

Your local BSS or Hair and Beauty Shop
You should be able to oils here as well.  A lot of these stores tend to sell mixed oils or blended oils which are okay so long as you buy the ones that are all natural  ( no petroleum, petrolatum or mineral oils).
A great thing about a lot of hair and beauty stores is that they are a good place to find ayurvedic oils.


How To Buy Oils- What You Should Look Out For

Make sure it is 100
100% natural that is.
The ingredients should be 100 natural and free from synthetic oils.  Preferably there should be only one item listed in the products ingredients.


Keep it Cold and Raw

olive
Try to buy oils that have cold pressed or extra virgin cold pressed written on the bottle.  This means the process of obtaining the oil from the plant was done without the use of heat.  Oils that are cold pressed and are still raw retain more of their nutrients and goodness in comparison to those created with heat.


Natural Mixes
Some ladies prefer to mix their oils themselves whilst others would rather purchase premixed oils.  Some brands of hair oils of greases are premixed and can be quite great.
If you decide to buy a premixed oil or hair grease, look through the ingredients listed and ensure it does not include synthetic oils.


Dark Bottles

castor oil
Extra virgin cold pressed oils and essential oils tend to be sold in dark bottles as this helps to block sunlight.  Sunlight can have an effect of the nutrients and quality of the oil so dark bottles are a plus.
Please note that some great quality oil brands are sometimes sold in clear jars or bottles.  This does not mean that they are not good quality.  All you have to do is keep oils out of the sunlight.
Don’t Rely on the Front Label
If a hair oil or grease/pomade is labelled as coconut oil, or olive oil, or shea butter, etc but when you look at the ingredients the items listed first are petrolatum, petroleum jelly or mineral oil,  put the oil down and walk away.


Special Tip For Buying Essential Oils
100% pure essential oils are usually sold in very small bottles (usually 10ml to 30ml).  This is because they are really strong and only a few drops is needed for each use.  Some companies however sell essential oils in quite big bottles and label them in large print as 100% of the essential oil, eg 100% rosemary oil or 100% tea tree oil.  However somewhere on the bottle in small print will be written “ this is 100% rosemary oil blended with almond oil”.

This isn’t really bad because it is an all natural mix, the labelling of such oils are however very misleading because many ladies buy these type of oils thinking that they are buying a pure essential oil.
I always recommend that ladies buy 100% pure essential oils as this allows them to blend it with their own choice of carrier oils and they can determine how much to blend themselves.


My Personal Favourite Oils

Through my hair journey I have always used the following oils, olive, coconut, Jamaican black castor oils.  For essentials oils rosemary and peppermint are my must haves.
I have tried many many many other types of oils but always come back to these five.
What are your favourite oils and how do you use it?


Initially intended to include advice for buying hair gels I this post but it would have been too long so I decided to just talk about oils for now. My next post will be a short and sweet styling post.  Now that I have committed myself I hope I don’t end up with epic fails
Come back soon ladies and happy hair journey

x

Lade

Learn | Change | Grow