CLEARER PICTURES

Hello Ladies.

I’ve been meaning to address the clearness of pictures on the site.  At the time I took majority of the photos on the site, they were taken for my personal use only.  Starting a blog was not on my agenda at the time so I didn’t mind that the photos were not very sharp.

Having started Hairducation, I decided to get a new camera and hope to improve the picture quality going forward.

IMG_0305

Testing testing

IMG_0366

Hairducation

Off to deliver a client’s wig! I was drawn to the colour yellow that day.


I hope you can see the improvement.

x

Lade

5 THINGS THAT CAUSE DAMAGE

Damage1

Forgive me for the mini hiatus,  my laptop and my fast-link refused to work together.  My laptop has now been exorcized  and I can update the blog at last.

So on with the post……..

In my teens, I washed my hair with anything that produced lather, I thought deep conditioning was just extra wahala for those who had the time, I would spend hours creating hairstyles with curling irons just for fun, I blow dried on the highest heat settings, the list goes on and on.  The fact is when you don’t know, you don’t know.  I did not know what good or bad for my hair.

So I thought I should do a post setting out some of the common things we do to our hair without realising that it may cause damage and breakage.

CONSISTENT USE OF DIRECT HEAT

Heat can be a friend or a foe to a black woman’s hair depending on whether it is direct heat or indirect heat.

INDIRECT HEAT

Damage4

Heat applied for deep conditioning and steaming are examples of indirect heat.   Indirect heat is beneficial for our hair because it assists with product penetration.   Roller setting is also regarded as indirect heat.


DIRECT HEAT

Damage6

Heat from hand driers, hair straighteners and curling tongs are examples of direct heat.
Direct heat appliances work by evaporating the hair’s internal moisture rapidly and temporarily re-arranging some of the hair’s internal bonds.  This is why blow drying dries hair quickly or curling irons creates curls in seconds.
With consistent use and improper preparation, direct heat can greatly damage our hair by increasing its dryness making it more prone to breakage.

I would advise that you cut down the use of direct heat as much as possible.  For example:

  • Try to air dry instead of blow drying, or if you blow dry, use the coolest setting on your hand dryer.
  • If you intend to use a straightener or curling tong, ensure your hair is clean, deep conditioned and a leave in conditioner has been applied, prior to using the heat appliance.  Also choose the lower temperature settings when using such tools to minimise the risk of burning.
  • A heat protectant hair product should also be used before applying direct heat.

I am not saying don’t ever use direct heat, my message is that it should be used very minimally in a healthy hair regimen.

NEGLECTING YOUR HAIR

Our hair like other parts of our bodies will not take care of its self.  We regularly take care of our teeth between visits to the dentist; you wouldn’t go for a facial and then completely ignore your skin till the next appointment.  Many of us however completely neglect our hair between salon visits.
This is something I used to be very guilty of before I started my hair journey.
There has to be some degree of at home hair care between salon visits.  If you have not already done so, I encourage you to read the how to care for black hair section of this site.  This will give you some guidance on what black hair needs to thrive.
So for example, if you are leaving your hair out, are you moisturising regularly? Are you wearing a protective hair style, is your hair covered at night when you sleep? Etc.
If your hair is in extensions, how are you keeping your hair and scalp clean? Is your hair being moisturised? etc.
A post of how to care for your own hair when wearing extensions will be on the site soon. So please stay tuned.

AGGRESSIVE HANDLING

Damage8

Damage I caused to my hair at beginning of my hair journey. I used to be very aggressive when combing the middle section of my hair and this is the result.

Many of us are convinced that our hair is  stronger than that of other races, that it is tough and can withstand aggressive pulling, the weight of extensions, can go for months without being washed, etc.  The opposite is true.  Our hair is delicate.  It is more fragile than that of other races and must be handled with care.  From cleansing through to styling, at every stage, be gentle with your hair. Give it some TLC. Treat it like fine silk, not like khaki!

BROKEN HAIR TOOLS

Damage12

Ensure your hair care tools are in good shape.
If your comb or hair styling accessories are broken or cracked, throw it away. The sharp edges of the broken part will damage your hair cuticles and can tear your hair.
If you use your fingers to detangle your hair, ensure your nails are smooth so they don’t snag or break your hair.
So take a second look at your tools and accessories (and those used at the salon).  Ensure they are good condition.

RELAXER ABUSE

I have addressed relaxers and how they work in a previous post.  However I thought I should reiterate on this post that hair should not be relaxer more frequently than every 8 weeks.  Also it is essential for correct procedures to be followed when hair is being relaxed to prevent severe scalp injuries and hair loss.  Please see this post for a step by step guide on procedures to be followed when relaxing.

I hope you find this post helpful and that it encourages you to be more cautious with your hair.

Learn | Change | Grow 

RELAXERS & HOW TO MINIMISE THE RISK OF HAIR LOSS WHEN RETOUCHING ( PART TWO)

Relaxer2a

For a complete grasp of relaxing and minimising hair loss from relaxing, please ensure you have read part 1 of this post.
Preparing black hair for relaxing should commence a week before the relaxer date.  This is especially important if your hair has just been removed from extensions. Hair should be removed from extensions at least a week before relaxer day.


ACTIONS TO BE COMPLETED THE WEEK BEFORE RELAXING BLACK HAIR

1)    Wash and deep condition with a protein conditioner
Hair that has a lot of new growth and hair that has just been removed from extensions tends to matt and tangle when being washed.  For this reason I would advise that the hair is thoroughly detangled and then put into 6 to 8 box braids (calabar with no extensions).
The hair can be washed and deep conditioned in the box braids as this will decrease the risk of the hair matting.  A detailed post on how to do this will be up soon.
A protein conditioner will give the hair the strength it needs to undergo the relaxing process.  A moisturising leave-in conditioner should be used to restore protein/moisture balance.

2)    Avoid scratching or irritating the scalp
Avoid scratching or irritating the scalp during the week.  Also your hair should be put in a simple style that will not require a lot of pulling and combing to achieve.  The style should also be easy to maintain or recreate during the week.
If you need to comb your hair during the week divide your hair into four sections, and comb through gently with a wide tooth comb.  This way you do not disturb your scalp. A scratched or irritated scalp has a high risk of burning and becoming damaged during the relaxing process.

3)    Moisturise and Seal   
The hair should be moisturised and sealed a few times during the week to prevent it from becoming excessively dry.


A STEP BY STEP GUIDE FOR RELAXER DAY

relaxer2b


1.    Part hair into 4 or more questions
Your hair should be parted into 4 or more sections.  I part my hair into 5 sections, 3 at the back and 2 at the front.  Because I relax every 4/5 months, I have loads of new growth so parting my hair into 5 sections for relaxing makes it easier to access the roots.
You can keep the sections separated by using a hair clip or hair band. When you are at the salon, ensure the hair is kept in those sections throughout the relaxing process, for ease of access.

2.    Detangle each section
Detangle each section gently with your hands.  This can be followed by a wide tooth comb if necessary.
This is ESSENTIAL.  Do not apply relaxer to hair that has knots and tangles.  If the tangles are left in the hair, if will cause bigger tangles and knots when the hair is being washed.  These will be very hard to remove by hand and will cause major damage if they are combed out.
To avoid this ensure your hair is thoroughly detangled before relaxing.  The salon may not be willing to spend that much time detangling thoroughly or gently enough.  I advise you to detangle yourself at home before going to the salon.

3.    Protect your scalp
Oils like pure olive oil, coconut oil, castor oil, etc should be applied to the scalp whilst detangling to protect the scalp.


4.    Protect hair that has been previously relaxed
Hair that has been relaxed previously must be protected to prevent over processing.  To do this, apply either an oil or conditioner to previously relaxed hair to protect it.


5.    Protect your hair line and perimeter
Ensure oil or hair grease is applied to your hairline and your ears to protect them.


 6.    Apply relaxer to new growth only
Relaxer must be applied to natural new growth only, it must not be applied to previously relaxed hair.  Applying relaxer to previously relaxed hair will cause over processing.  Over processed hair will break gradually over the following weeks and months.


relaxer2c

7.    Avoid combing through hair when there is relaxer in it
The back of a rat tail comb may be used to smooth in the relaxer or hands can used to pull the hair straight.  Combing through can lead to damage and may also irritate the scalp


8.    Rinse after time recommended by the relaxer brand
The direction provided on the relaxer jar or box will specify how long the relaxer should be left on for.  Do not wait for your scalp to start burning before rinsing out the relaxer.


9.    Neutralise at least 3 or 4 times.
After the relaxer has been rinsed off, the hair should be washed with a neutralising shampoo a minimum of three times.
During the second or third wash, the shampoo lather should be left in hair for about five minutes to give it time to penetrate the hair shaft and fully neutralize.  Personally I neutralize 4 times, I’d rather be safe than sorry.


10.
  Deep Condition

After neutralizing, your hair should be deep conditioned with either protein or a mixture of protein and moisture conditioners.
If you use a protein conditioner alone, ensure you follow up with a moisturising leave in conditioner to help restore protein and moisture balance.  Your hair can then be roller set or blow dried gently.


11.  Well done
If you have followed all the instructions above, then you will have greatly minimised the risk of hair loss from the relaxing process.

 DSC06482

                                           Early 2013-  My hair after a successful but tiring relaxer day

HAIR CARE FOR THE FIRST 2 WEEKS AFTER RELAXING

Do not install braids or weaves in the first two weeks after relaxing your hair.
Hair that has just been relaxed needs a lot of TLC and cannot withstand the tension of extensions.  After the two week period, ensure your hair is washed and deep conditioned with a mixture of protein and moisture conditioners before the extensions are installed.
Ensure you take care of your hair in those two weeks, i.e., moisturise and seal regularly, wear protective hair styles, etc.


I hope the above guide has not been too daunting and I hope your next relaxer sessions goes really well.


Learn | Change | Grow


x Lade  


RELAXERS & HOW TO MINIMISE THE RISK OF HAIR LOSS WHEN RETOUCHING (PART 1)

 Relaxer101

I used to be the girl that would remove her weave and get her hair relaxed on the same day.
I often left the salon disappointed because my hair would be the same length or in some cases shorter and thinner than when I installed the weave. I did not know what I was doing wrong.

A lot of us relax our hair but unfortunately a large percentage of us suffer hair loss as a result of it.  This blog post will be the first of a two part series about relaxers and how to prevent hair loss as a result of relaxing.

In this post I will address the following

1)      How do relaxers work  (to give readers a better understanding of the risks involved)

2)      Types of relaxers (to help readers decide which is best for their hair and scalp)

3)      How often should hair be relaxed   

4)      Preparing hair for retouching and why this is an ESSENTIAL step for preventing breakage


HOW  DO RELAXERS WORK

Hair structure

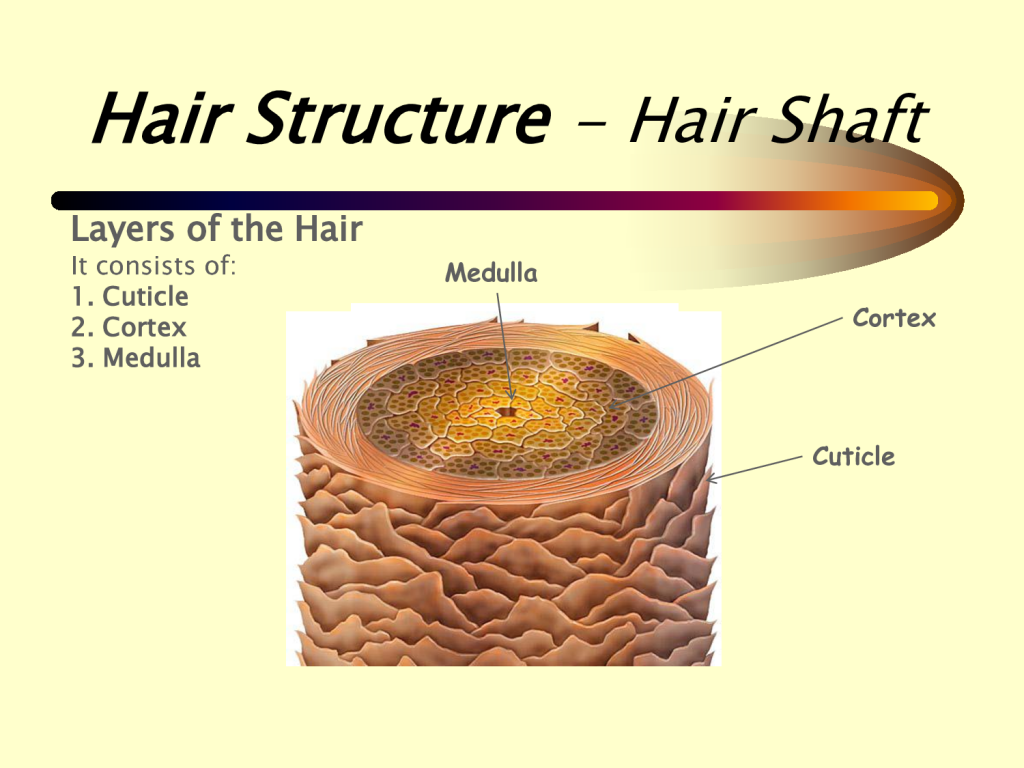
Our hair has several types of protein links/bonds in its structure.  Relaxers work by opening the cuticle layer and penetrating the cortex of our hair.
The relaxer breaks some of the protein links in the cortex our hair.  The hair is then smoothed/pulled into its new straightened shape.


The unfortunate truth is that relaxers work by weakening the structure of black hair.  Please note however that relaxed hair can still look healthy and be strong if correct steps are taken before, during and after relaxing.
If relaxers are abused or used too often it can result in damage to the scalp and cause major hair loss.  This risk is well publicised but unfortunately several of us ignore this advice because the hair loss that occurs may not be immediate.  Relaxer abuse will result in weakened hair that breaks gradually over weeks and months.


TYPES OF RELAXERS


LYE RELAXERS

LYE


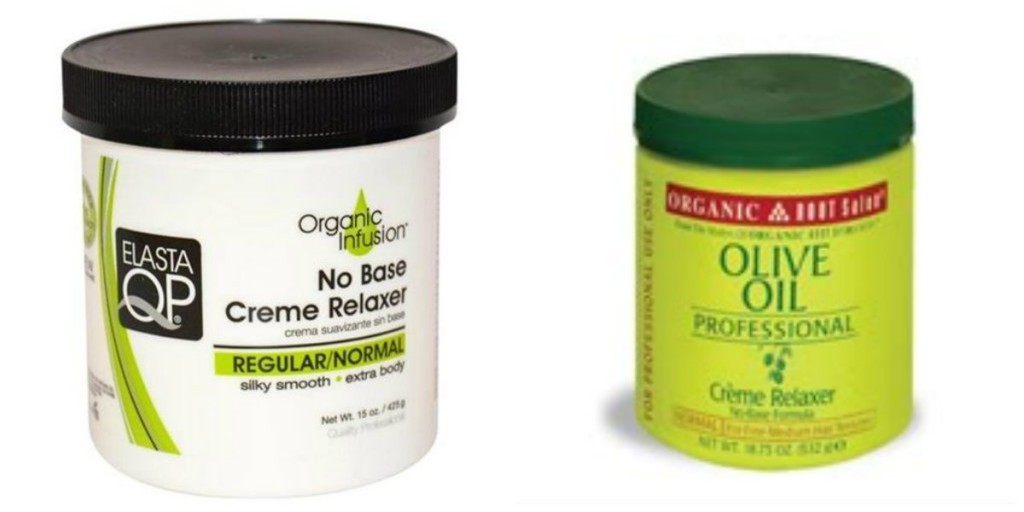
These are usually packaged in a jar or tub and are ready for use, i.e. there is no need to mix them with activators. They are sometimes called No-Base Relaxers.

PROS
Lye relaxers are said to be better for hair fibres because the formula does not leave mineral deposits on the hair. Mineral deposits left on hair fibres can hinder its ability to absorb moisture.
Also the levels of protein breakage that occurs with lye relaxers will allow the hair to retain more of its natural strength and elasticity than no-lye formulas.

CONS
Lye relaxers can be quite harsh on our scalp  in comparison to no-lye relaxers. For this reason, lye relaxers may not be suitable for ladies with very sensitive scalps or ladies that burn easily.


NO-LYE RELAXERS

NoLye


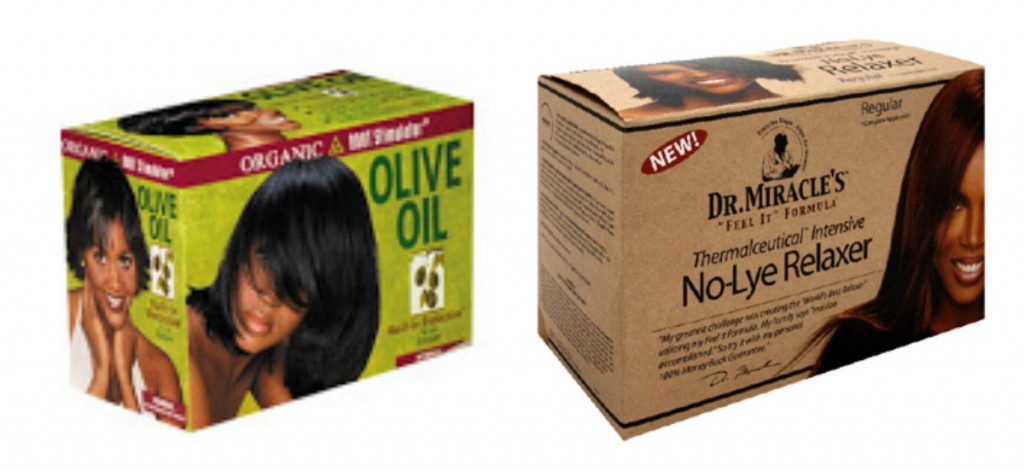
These usually come in a box kit that contains activators to be mixed in to activate the formula.

PRO
No-lye relaxers are said to be
“easier” on the scalp than lye relaxers.  This means that it is not as harsh on the scalp as lye formulas.  So if you have very sensitive scalp which burns easily you may want to consider using a no-lye relaxerPlease note that all chemical relaxers (lye or no-lye formula) can cause severe scalp burns and hair loss if it is used incorrectly

CONS
No-lye relaxers can leave our hair quite dry.  This is because no-lye formulas leave some mineral residues on our hair fibre which decreases its ability to absorb moisture
Remember dry hair has a higher risk of breaking. To overcome this problem a chelating shampoo should be used once a month if you use a No-lye relaxer formula. Chelating shampoos work beneath the surface of the hair fibres to remove stubborn minerals from no-lye relaxers, chlorine in swimming pools and hard water residue.


HOW OFTEN SHOULD HAIR BE RELAXED Relaxer 6

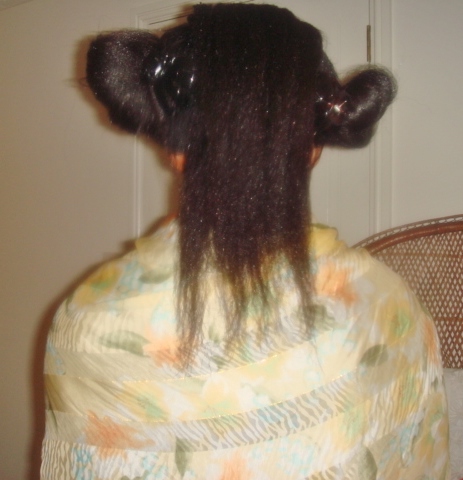
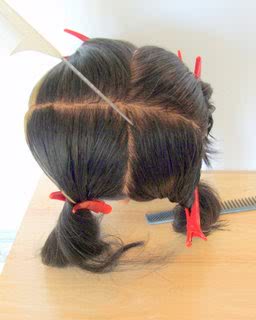
My hair 16 weeks after it was relaxed, at the Naturals in The City Event in Lagos
New camera! Please bear with me whilst I learn how to adjust the camera light settings.


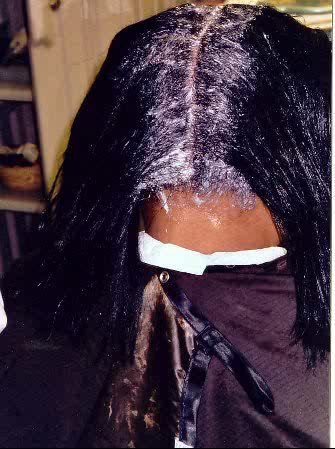
When your hair has been relaxed, you should
wait at least 8 weeks
before your next relaxer.  Relaxers are meant to be applied to new growth and not on hair that is already relaxed.
The amount of new growth we have before 8 weeks is usually less than 1 inch long.  If relaxer is applied to hair that has very little new growth, it will come in contact with previously relaxed hair thereby relaxing it twice and over processing it.
Over processed hair is very damaged and it will break easily over  the following weeks and months.

Stretching Beyond 8 Weeks
The directions on most chemical relaxers suggest that hair should be retouched every 8 weeks. Please note however that you can extend the amount of time between your relaxer touch ups for longer than 8 weeks.
Extending the amount of time between your relaxers for more than 8 weeks is known as stretching.  For example several ladies on healthy hair journeys stretch their relaxer touch ups to every 10 to 12 weeks,
I relax my hair every 20 weeks.
I will elaborate on stretching, its great benefits and how to take care of hair whilst stretching in a separate post.


PREPARING HAIR FOR RELAXING

protein conditioners

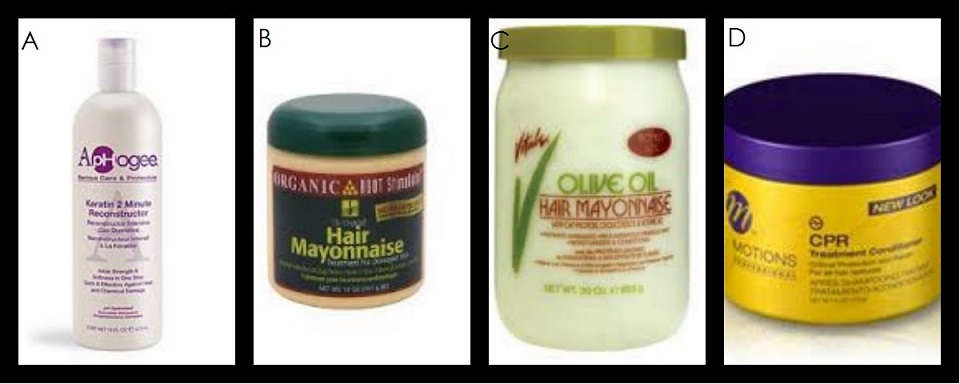
Protein Conditioners

As noted above relaxers work by breaking down some of the protein bonds in our hair.  If hair that is lacking in protein is relaxed, you can begin to imagine how fragile it will be after the relaxer process.   Hair this fragile and damaged will not be able to withstand daily wear and tear and although breakage may not be immediate, it is almost inevitable.  It is therefore essential to prepare for relaxing by ensuring that your hair is not lacking in protein. Hair should be washed and deep conditioned with a protein conditioner a week before it is relaxed.

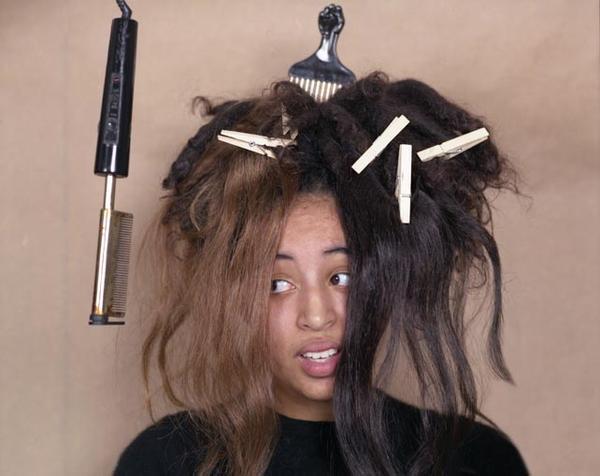
Hair that has just been removed from extensions is usually weak and in need of protein so to proceed to relaxing it the same day is a recipe for disaster: sooner or later the breakage will occur.
Hair that has been removed from extensions should be thoroughly detangled, washed and conditioned with a protein deep conditioner the week before relaxing.   The hair should be washed in sections or in  single braids to prevent matting and tangles.
Allowing a week between removal of extensions and relaxing will also give your scalp a chance to recuperate.

 As always,  I hope the above facts has helped somebody out there.

Please come back soon for part two which will provide a step by step guide for the actual relaxing process.

Learn | Change | Grow


Coming Soon to Hairducation

Coming soon

I never intended to start a hair care blog.
I was just another girl with hair issues when I began my  hair journey.  But as my hair grew longer, people around me noticed and started asking for advice and tips for their own hair.

I am always happy to answer hair related questions however it is hard to break down all the aspects of a hair journey in brief conversations with people who approach me. I decided that the best way to overcome this problem was to create my personal online hair care guide and now I can direct whoever approaches me here.

The truth is I love talking about hair and this blog gives me a perfect excuse to do so in a clear and concise manner.

There are so many topics and information I want to share and discuss such as:

PRACTICAL HAIRCARE TOPICS
Relaxer Do’s and Don’ts –  a detailed guide and practical tips to help prevent hair loss as a result of relaxing.
Divide and Conquer– why you should do everything to your hair in sections and how it minimises breakage
How to combine healthy hair care practices with wearing extensions – Three part series

EDUCATIVE TOPICS
Why we have to make a conscious effort to grow our hair unlike other races
Why black hair appears to stop growing at shoulder length
How much of hair length and thickness is down to genes
Why shiny hair isn’t the same as healthy hair

TOP 10 & TOP 5 SERIES
Top 10 things which damage black hair
Top 10 hair inspirations -ladies whose hair made my jaw hit the floor and inspired me to begin my own hair journey
Top 5 mistakes I made at the beginning of my hair journey

SOCIAL CULTURAL BLOG POSTS
Guest features

Style trends
Celeb looks


I hope a few of the above topics grab your attention and that you will find them informative, motivational and entertaining.

I am so excited get started so please visit the Hairducation blog home page for regular blog posts.

Learn | Change | Grow