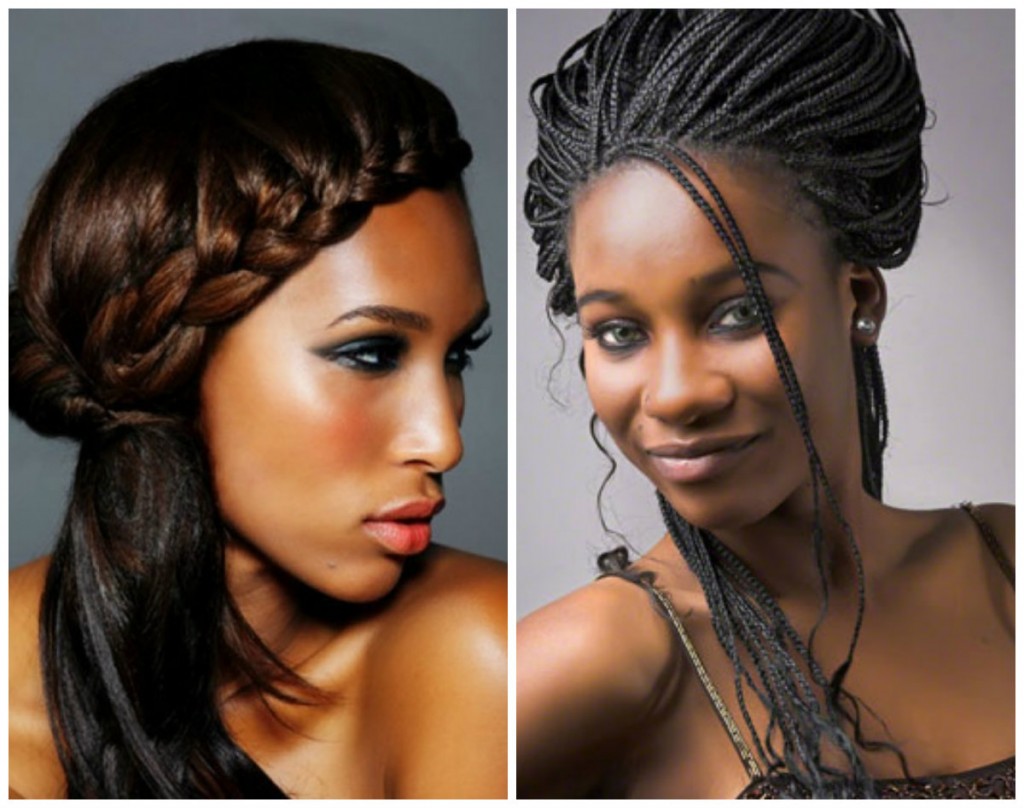
BED HAIR- HOW I PROTECT MY HAIR AT NIGHT

Hello ladies,
I cant even begin to explain all the technical hiccups I’ve had recently. I am just glad I am able to start blogging again.  The good thing is I have a backlog of posts to share which I will put up together at the same time.  Hopefully that will make up for my recent absence.

So on with the first post.

I have been asked by several readers to share my night time hair regimen.
I don’t wrap my hair around my head in a circular motion for the following reasons

1)      I would have to use a comb to wrap the hair round my head.  I avoid combing my hair more than once a week.  Therefore nightly combing is a big no no for me.

2)      A lot of ladies who wrap their hair round their hair at night do so because they intend to wear it down the next day and want it to be crease free.  I hardly wear my hair down because I love buns and up-dos.  I wear protective  styles majority of the time so I do not mind if my hair has a few creases it when I wake up in the morning and remove my scarf.

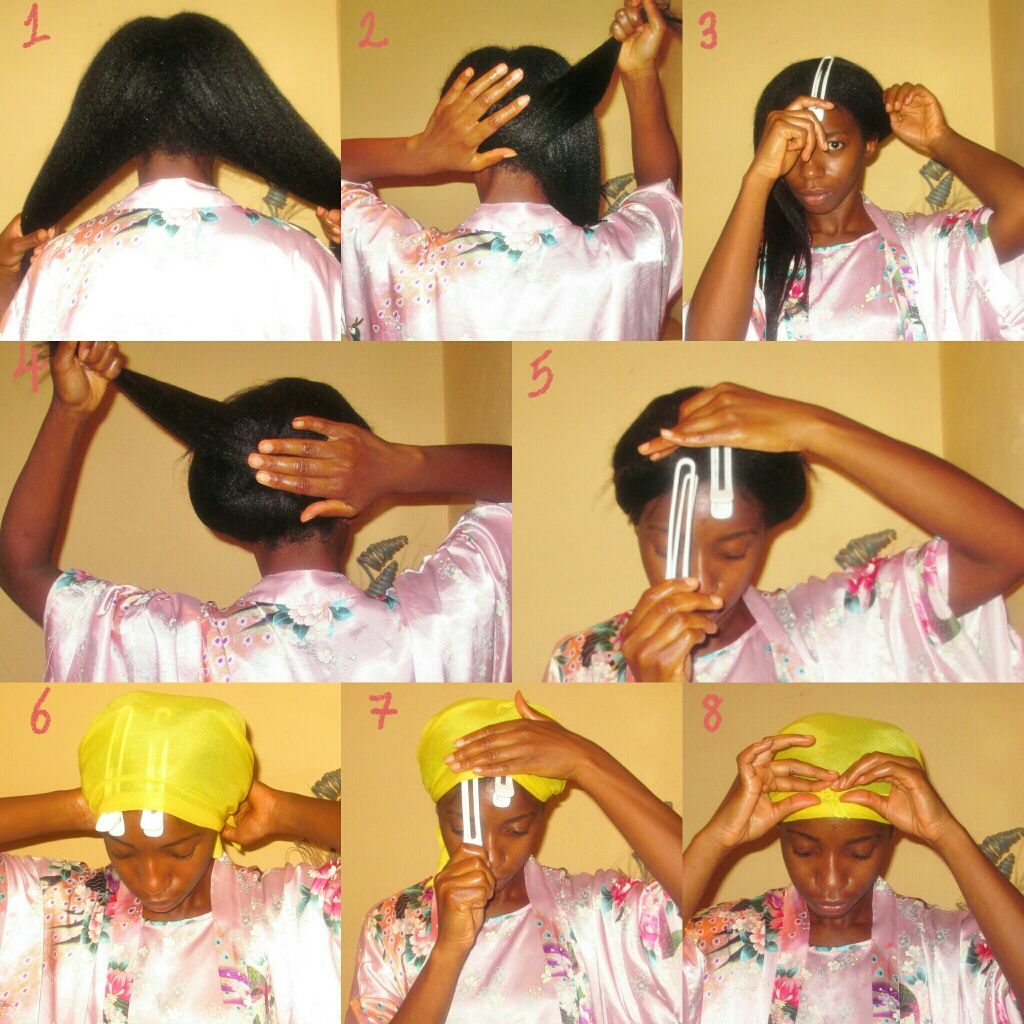
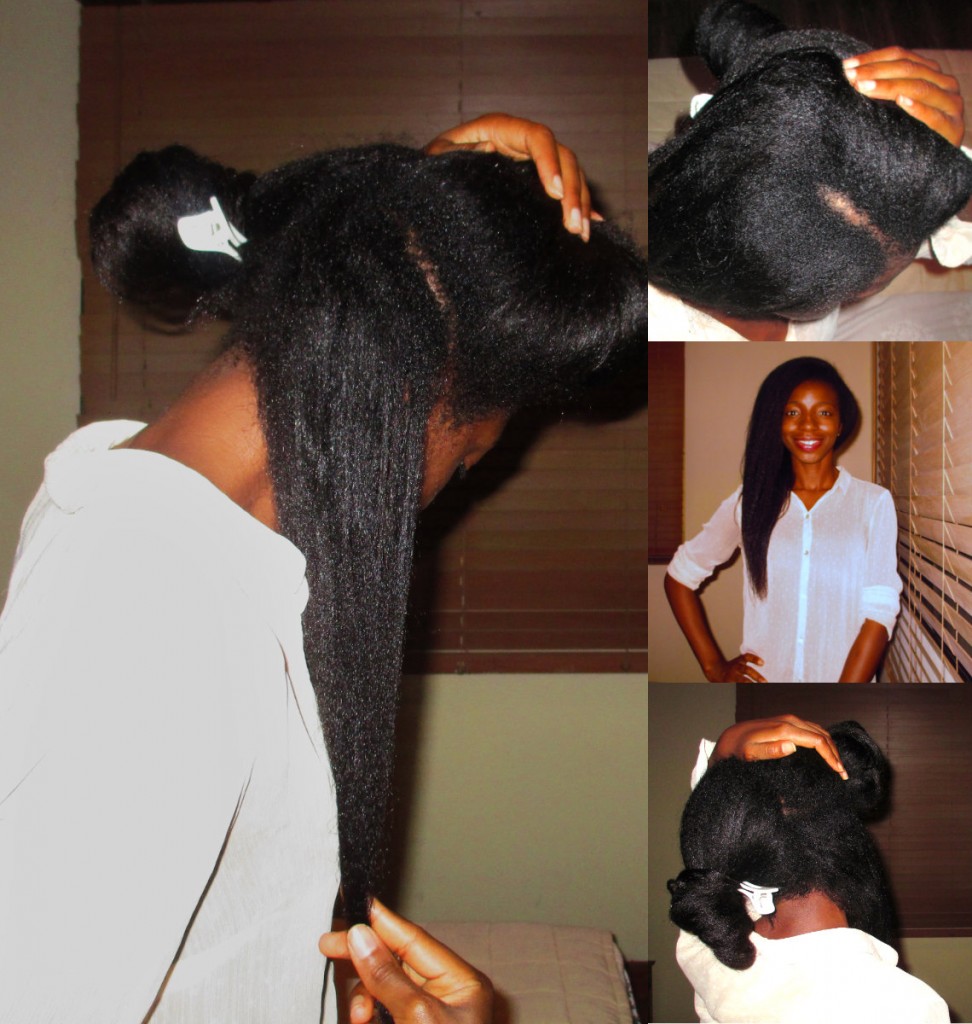
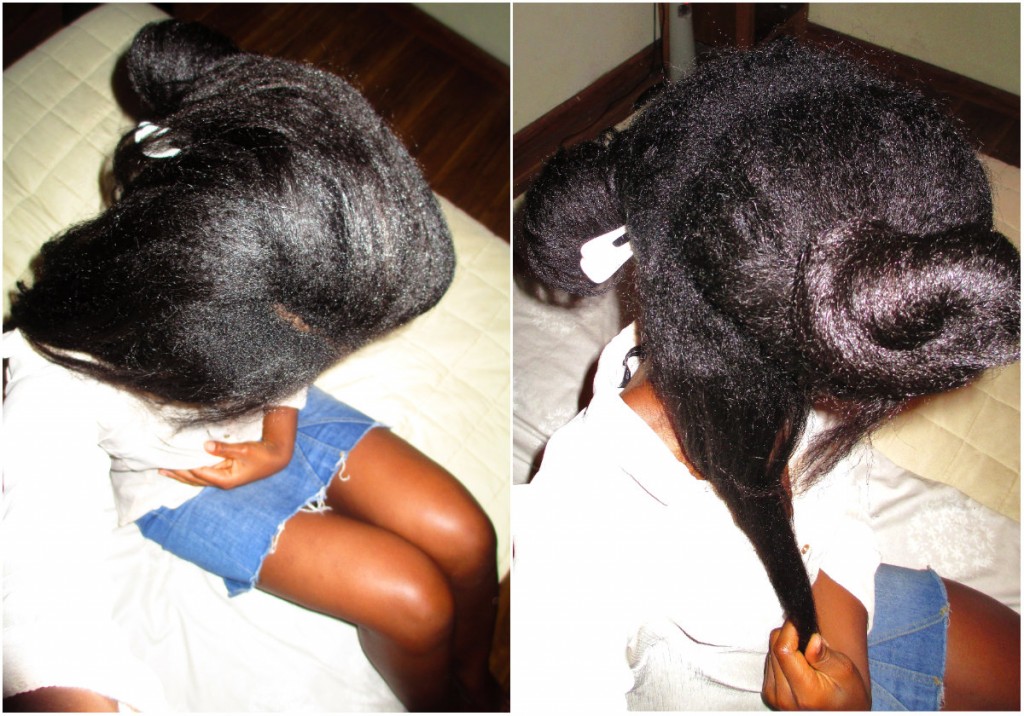
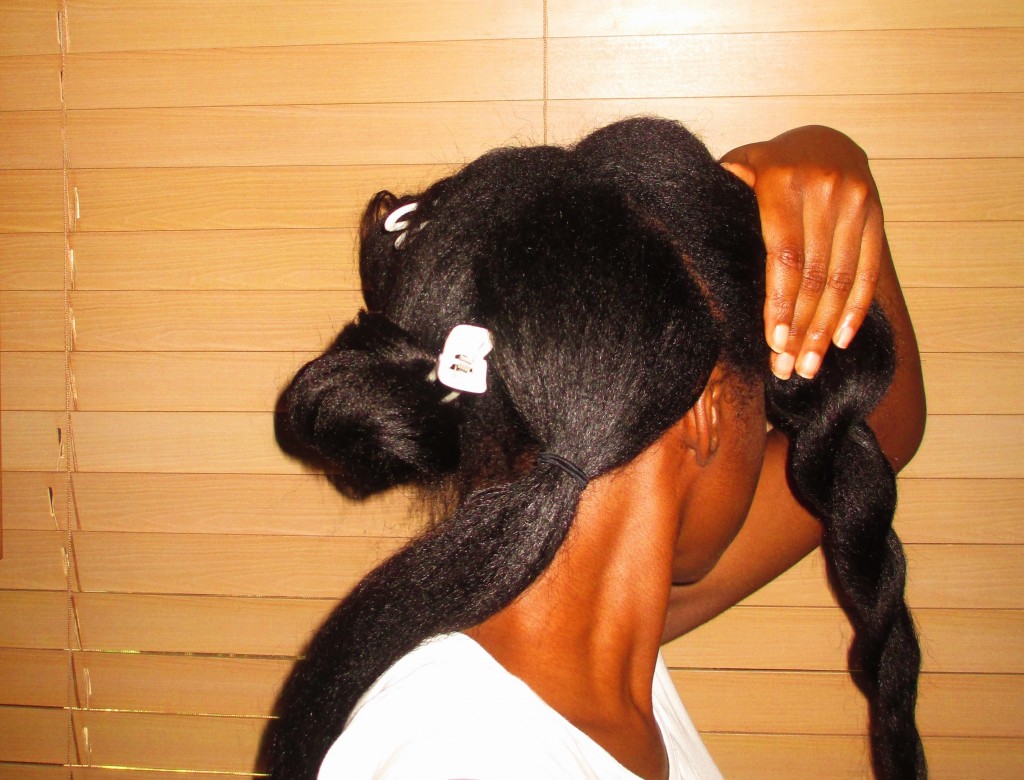
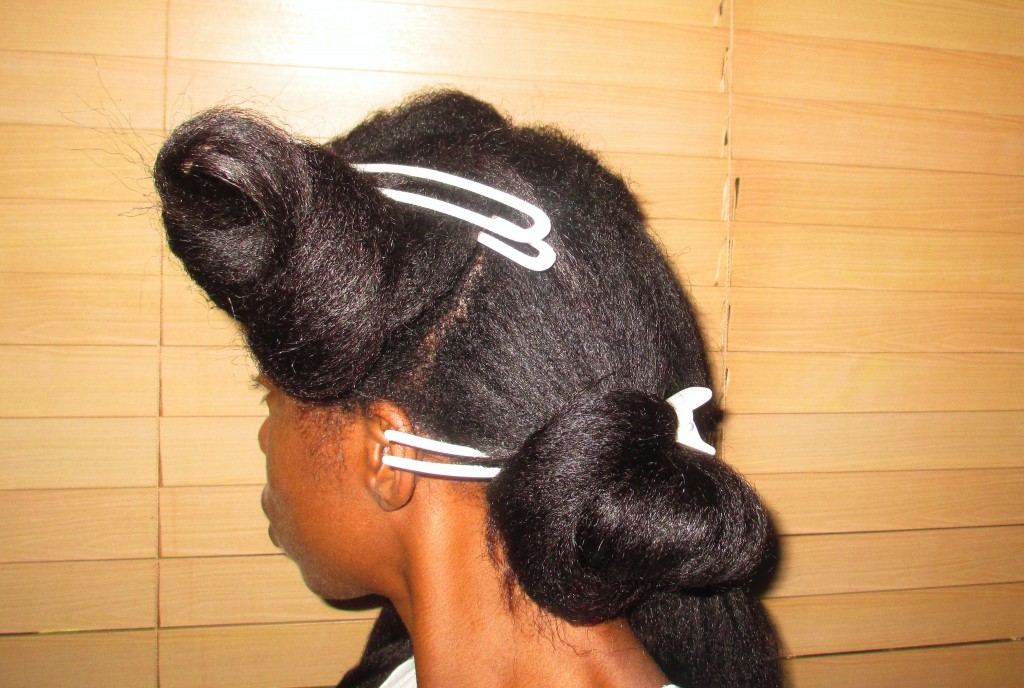
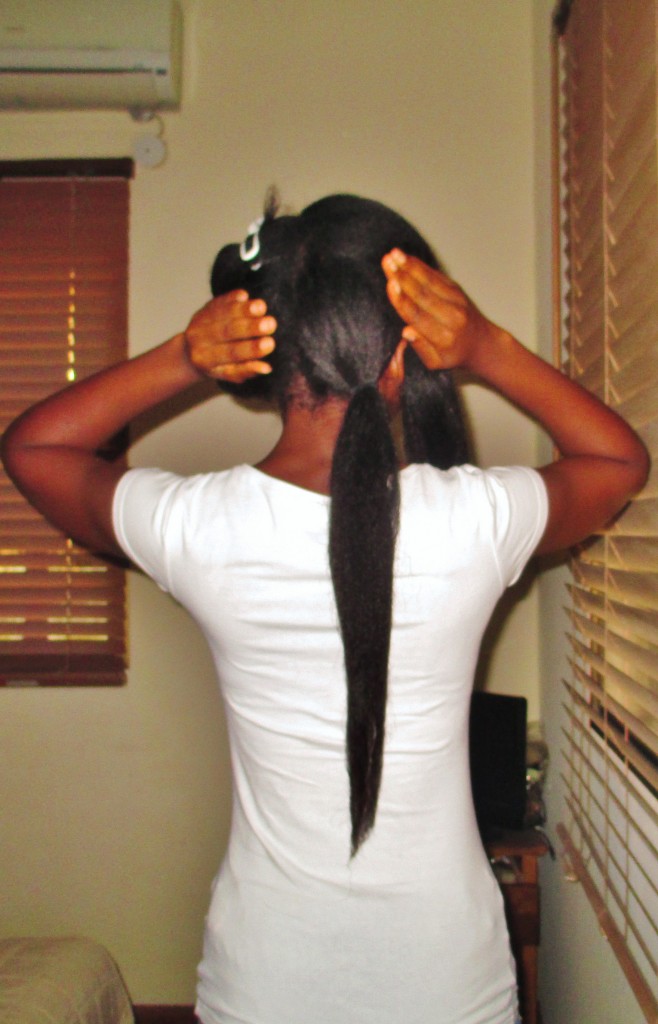
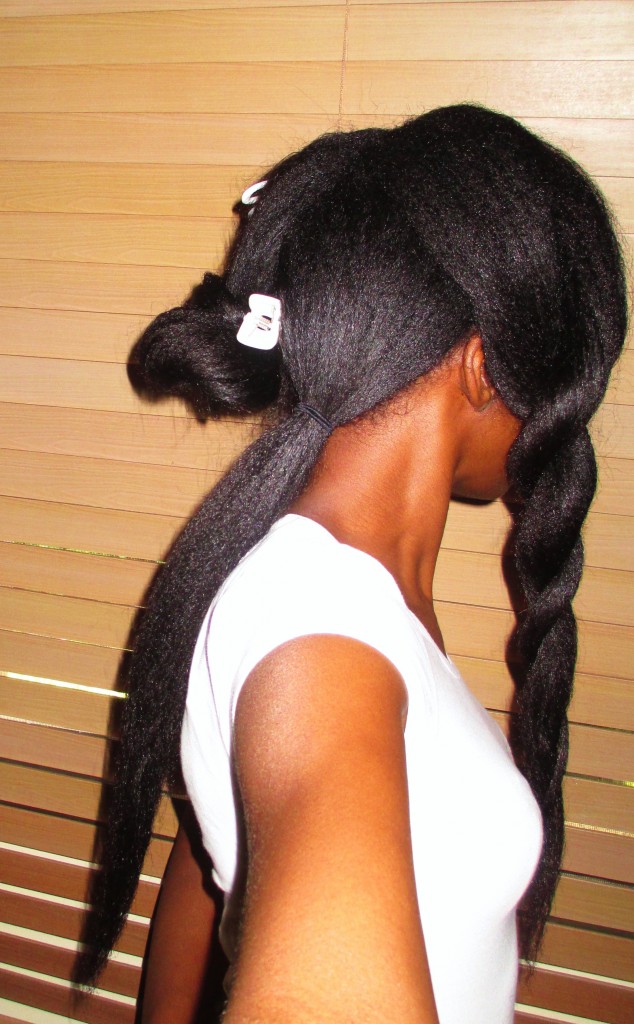
What I do with my hair at night is known as a cross wrap.


WHAT IS CROSS WRAPPING
Nighthaircollage


1)      Moisturise and seal my hair.  Part it into two with my fingers.

2)      Take one half and wrap it round the opposite side towards the front of my head.

3)      Use a clip secure the hair at the front

4 &5)      Repeat 2 and 3 with the other half.

6)      Cover hair with a satin scarf and tie loosely

7)      Slide out the clips gently

8)      Adjust the front of the scarf to ensure that no hair is sticking out and tighten scarf

With cross wrapping I have some bends or creases in my hair when I wake up the following day but I don’t mind.

Please note that cross wrapping is not the only way to protect your hair at night.  I am just sharing what I do with my hair and what works for me.

I hope you have found this helpful.

Stay tuned for a hair style pictorial coming up in a few minutes ( as long as my laptop co-operates)

x

Lade

Learn | Change | Grow

HAIR UPDATE – Up Close & Personal With My Hair At 14 Weeks Post

IMG_1663

Its hair update time.

I think it’s important to keep things real with my readers and paint an honest picture of the challenges I face on my hair journey. These are challenges you might face as well especially if you intend to stretch your relaxer like I do.

So as you may know, I relax my hair every 5 months (20 weeks). I have decided however to stretch even further and I relax my hair at 6 months.
I am currently 14 weeks post relaxer ( which simply means the last time I relaxed my hair was 14 weeks ago). Usually I start wearing my wigs from 10 weeks post but I’ve been enjoying having my hair out and was a bit reluctant to put it away….but you know what? I think I ‘am ready.

Don’t get me wrong, I absolutely love my new growth. I love how springy it feels but what I love the most is the volume it gives my hair. I have about 1.5 inches of natural hair at the moment so I have a mini fro beneath my relaxed hair. When it comes to MY hair, the bigger and poofier it is, the happier I am, so right now I am pretty happy.

The reality however is that there are some challenges that come with managing hair that has a lot of new growth.


CHALLENGES OF STRETCHING MY RELAXER

14 weeks

1) MANAGING TWO TEXTURES
When you have a lot of new growth beneath your relaxed hair, it is important to take care of both textures to reduce the risk of breakage.
I have keep both my natural new growth and my relaxed hair moisturised. However I have to be extremely gentle when handling hair with this much new growth. This is because the line of demarcation (where the relaxed hair meets the natural new growth) is very delicate and will break easily if handled roughly.
A lot of ladies notice that their new growth may feel dry. The only way to overcome this is to give it what it needs, moisture. I use braid spray or S curl to keep my new growth soft and moisturised.

2) MORE TIME & MORE WORK
I find that when I have a lot of new growth, my hair tangles and forms knots easily. The more new growth I have, the more times I have to detangle during the week. And because I have to be very gentle (because of the weakness at the line of demarcation) it takes me longer to detangle, moisturise and seal my hair.

I usually get away with detangling my hair once a week but when I have a lot of new growth like I currently do, I have to detangle my hair 2 or 3 times a week.
The fact is the more new growth I get, the more time I have to invest in keeping both textures happy.
Look at the picture below, imagine how long it takes me to get through all of that………


14 weeks+


3) SHRINKAGE

All that lovely new growth means that my hair is higher/taller at the root (if that makes any sense). This makes it look slight shorter. I don’t mind to be honest.
In fact I kind of like it cos on relaxer day I’ll be like “ oh yea, I forgot how long my hair is”.

4) THINNER LOOKING HAIR
Because of the afro at the roots of my hair, the relaxed part of my hair look thinner than it actually is. I am not a fan of this but it is only temporary.

I don’t want to give the impression that natural new growth is a problem.  That IS NOT the message of this post.  The point I am trying to make is that when you have a lot new growth you have to amend your regimen slightly so that you take care of both textures. 

The main reason why I still wear wigs is to help me stretch my relaxer. The wigs give me a mini holiday from my hair. Rather than risk neglecting my hair, wigs helps me to cut back on the amount of time I spend detangling.
So with the that said, I think it’s time I put my hair away and switch to my wig regimen till I relax my hair early next year. For details of my wig regimen see this post.

A hair journey can be hard work sometimes but it is a positive thing. I compare it to trying to exercise, eat right and stay healthy, it’s not easy but it has its benefits.

I hope this post will encourage you to keep trying despite the challenges.

In the next couple of posts I will discuss mistakes I made earlier on in my hair journey and my bed time hair routine.

Thanks for visiting and see you again soon

X
Lade
Learn | Change | Grow

HAIR CARE IN SECTIONS


IMG_1489

Breakage!!!  We all hate it and yet there are so many easy ways to avoid it.
A great way to reduce breakage is by handling or working on your hair in sections.  I am a full blown sectionista.  From detangling through to moisturising and sealing, I always work in sections when I am caring for my hair.

ADVANTAGES OF HANDLING HAIR IN SECTIONS

1) It will make it easier for you to locate and untangle knots in your hair.

2) If you have an area where your hair is weak or the scalp is sensitive, you can section that area off so that you can give it extra tlc or handle it gently.

3) It ensures better product distribution, for example, applying moisturiser in sections will ensure that all you hair gets a good share of the hair product.

4) It will give you better access to you scalp.

5) It helps in reducing the damage that can be caused by combing.  This is because you can gently ease the comb through smaller sections of hair rather than trying to drag/force it through all your hair at once.


PRACTICAL TIPS FOR HAIR CARE IN SECTIONS

IMG_1499

1) Divide your hair into 4 or more sections depending on how full and long your hair is.

2) The sections don’t have to be neat, straight or the exact size.

3) You don’t have to use a comb to create the sections.  Your fingers can do the job.  Ensure your nails are smooth.  I can’t tell you how many times I’ve ripped out hair because my nails were rough.

IMG_1477

4) Use a hair clip or band to keep the sections separated.  Alternatively you can put each section in a loose braid or twist

IMG_1488


5) Try to complete as many of your hair care tasks in sections, i.e, detangle in sections, wash in sections, apply conditioner in sections, etc.

I hope you have found this post useful and that it will encourage you to try handling your hair in sections.

X

Lade

Learn | Change | Grow

HAIR CARE WHILST WEARING EXTENSIONS (Part 3)- removal of extensions and washing in braids guide

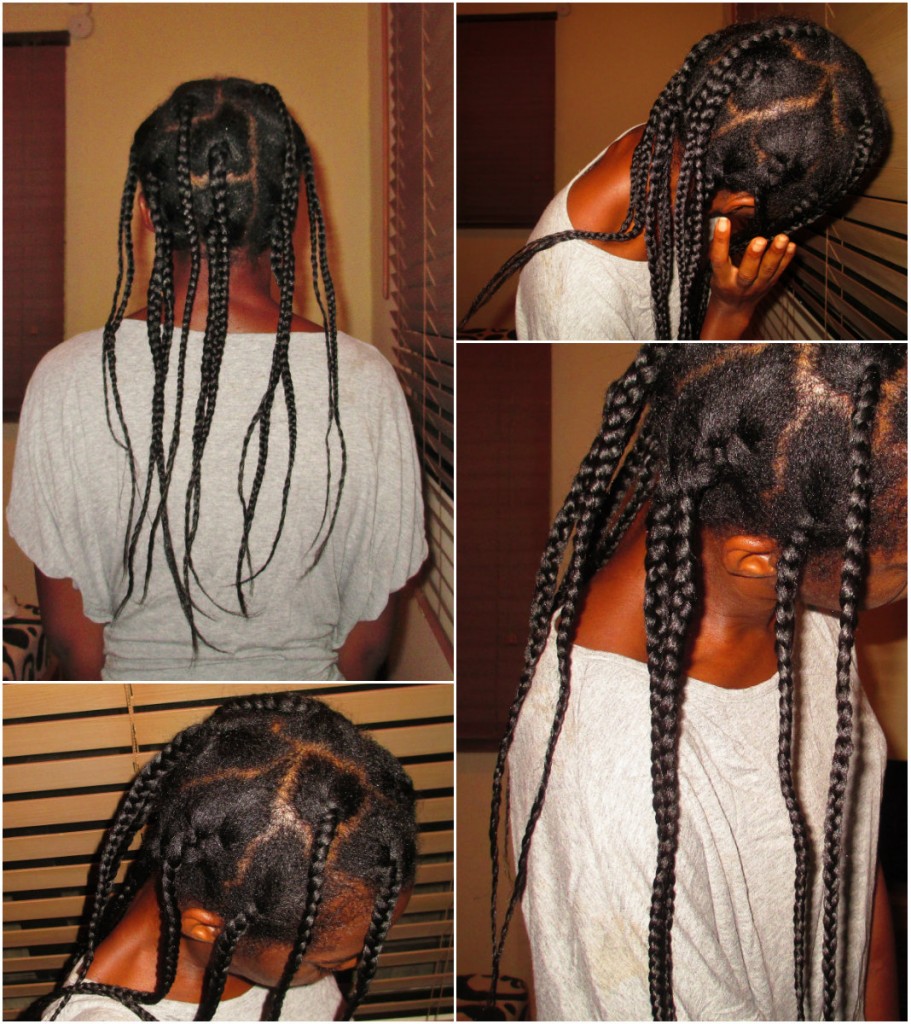
hair in braidsMy hair put into single braids before being washed  

Hello ladies, I am such a naughty blogger.

I’ve been meaning to update the blog but I’ve been so busy that my head is spinning half the time.  My own hair has been under one of my Hair by Type 4 wigs because I knew I would be really busy and not have as much time to take care of it. I am also a little under the weather and now that I am forced to sit and actually rest, I finally have time to publish Part 3 of the hair care in weaves and braids series.

In this post, I will discuss how hair should be removed from extensions and how to cleanse your hair after extensions have been removed.  I hope the following tips will help you avoid unnecessary hair loss.
Please ensure you have read part 1 and 2 of the series.


REMOVAL OF EXTENTIONS & AFTERCARE

1) Detangle as you unravel.  When undoing the cornrows underneath the weave or the plaits of your braids, detangle as you go along.
If you wait till you finish undoing the weave tracks or braids before you detangle, it is likely that you will become overwhelmed and not detangle properly and you may also fail to remove the shed hairs.

2) Do not use combs to rip out knots.  Use your fingers to loosen and separate any knots or matted hair you come across.   You can then follow gently with the use of a wide tooth comb.

3) A little olive oil can be applied to the knots or matted hair to assist with detangling.  Olive oil is known for helping to remove shed hairs.  Alternatively if you own a detangling spray, a little can be sprayed on the knots and matted hair.

4) Wash and deep condition (in single plaits)
We are often advised to wash and deep condition our hair after extensions have been taken out to remove dirt, build-up and to restore moisture and strength to our hair fibres.  However this can result in matted hair.  This is because when water is poured on hair that has just been removed from extensions, the shed hairs slip and often tangles with other hair strands.

However washing your hair in single braids (calabar) restricts the movement of the shed hairs  and prevents it  from tangling or forming locs.

The process is simple

  • Unravel and detangle each braid or weave track.
  • After the whole head has been detangled, plait your hair in 6 or more single plaits (see the picture above of my hair in braids)
  • Wash and deep condition your hair with the single braids in.
  • Rinse thoroughly
  • Undo each braid, apply your leave in products and detangle.
  • Air dry or blow dry on a cool setting and then moisturise and seal.

This may seem long winded but it works very well in preventing matting.

I hope you find this post useful.  Now I am going to do two things, take my next dose of pain killers and call up a few friends before they think I am missing.

I have a HUGE announcement coming really soon……I’ve been up to something….its hair related and is one of the main reasons why I’ve been so busy (and tired) lately.
I really can’t wait to share it all with you.

x

Lade

Learn | Change | Grow

HAIR CARE WHILST WEARING EXTENSIONS (part 2): How to care for your hair within extensions

Hair care in extensions

Weaves and braids can be great protective styles however access to your own hair is restricted.  This makes it difficult to care for your own hair underneath or within the extensions.  It is essential however that you complete some aspects of your hair regimen despite the restricted access.

This blog post will provide guidance on the safe installation of extensions and how to care for your own hair when wearing weaves or braids.   I must warn you, it’s a long one.  So I suggest you read it over a few days to avoid getting confused or overwhelmed.

Please ensure that you have already read the previous post which addresses the pros and cons extensions.  Also please ensure you have read the contents of the How to Care for Black Hair guide.
This guide will help you understand the principles of hair care and how to apply them to your hair when wearing extensions.

WHAT YOU SHOULD DO TO YOUR HAIR BEFORE INSTALLING EXTENSIONS
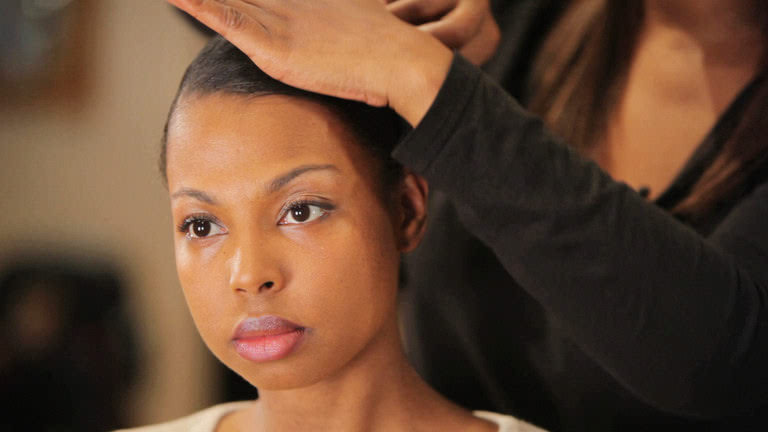
prep for weave2


1)      Ensure your hair is in good condition before installing a weave or braids.
If your hair is in a poor state I would suggest that you follow a hair regimen until your hair is better and then you can return to wearing weaves as a protective style from time to time.

2)      If your hair is in a poor state and you would rather not wear it out, consider wearing wigs which will give you access required to care for your hair until it is in a good state.

3)      If your hair is in a good state, ensure that you wash and deep condition your hair before installing the weave.  Use a protein deep conditioner to help strengthen your hair in preparation for your install.  If your hair is protein sensitive you can use a mixture of protein and moisture.

4)      Use a moisturising leave in to help ensure moisture and protein balance.

5)      Detangle with your hands and follow with a wide tooth comb.

6)      Moisturise and seal your hair lightly.  Your hair should feel strong but supple/flexible.  It should NOT feel dry and crunchy.

7)      Never ever EVER relax your hair and get a weave or braids done the same day.  Wait at least two to three weeks before installing braids or weaves.
If for whatever reason you prefer to not wear your hair out during this period remember a wig can be worn.


HOW TO INTALL EXTENSIONS CORRECTLY
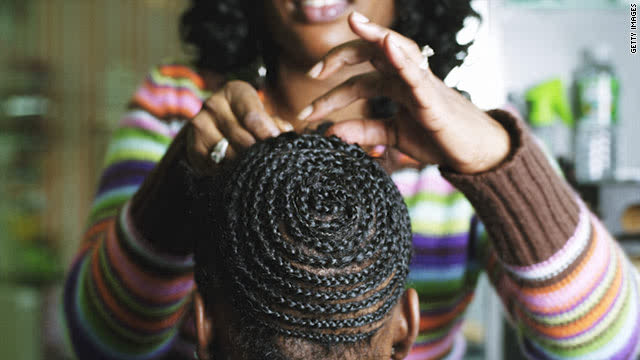
Prep for weave


1)      Avoid excessive or aggressive combing when the braids or cornrows for the weave are being made. A wide tooth or medium tooth comb should be used to comb the hair.

2)      Ensure the cornrows are not excessively tight, small bumps around hair line or white tipped hairs sticking out around the hairline are signs that the braids or weave is too tight.  Remember that hair around the hairline is usually very delicate.

3)       For weave, as far as possible the hair should be stitched on in a way that allows as much access as possible to the cornrows underneath.  This will give you a little access so you can care your hair to some degree whilst wearing the weave.

4)      For braids, avoid adding too much extension hair to each section.  The weight of the extensions combined with the tightness of the braid may pull out hair and can damage to the hair follicles especially along the hair line.
Remember don’t put a hairstyle above the risk of permanent damage to your hair follicles.


HOW TO INCORPORATE A HAIR REGIMEN WITH WEARING EXTENSIONS


CLEANSING

Research I have done suggests that hair in extensions should be cleansed every two weeks.

There are two methods through which you can cleanse your own hair and scalp when wearing weaves and braids.

Option 1: Diluted Shampoo
Shampoo can be diluted with water and put in a spray bottle or applicator bottle.

The diluted shampoo should be sprayed/applied to the cornrows/tracks for the weave or the base of the braids, massage for a few minutes to create some lather and lift dirt. Rinse thoroughly and wrap in a towel/tshirt to absorb the water.

I must say that when I wore weaves in the past I never cleansed my hair using this method. For me it was like having a bath with clothes on and I was not sure if the extension hair would hold up.  I wanted to avoid getting the extensions tangled and matted.
Several ladies however wash their hair with weaves using this method without any problems.
When I wore braids in the past, I washed it using this method.


Option 2: Dry clean
Because I never felt comfortable with washing my hair in weaves I came up with a way to clean my scalp: baby wipes.
I would gently rub my scalp (the spaces between the tracks) with the baby wipes to remove dirt and grease.  I did this once a week.

Alternatively, cotton wool pads and very warm to water can be used.
The cotton wool pads should be dipped in the water, squeezed and then used to wipe your scalp gently.

The heat from the cotton wool really helps with lifting dirt and grease from the scalp.

The down side to this method is that although it cleans the scalp it will not clean the hair itself.

I overcame this issue by avoiding the use of heavy creams and lotion on my weave tracks.  I used light sprays and light oils instead.


CONDITIONING

There are two methods of conditioning your own hair whilst wearing extensions.

Option 1: Diluted conditioner
Your conditioner can be diluted with water and put into an applicator bottle.  It can applied to the cornrows/tracks for the weave or the base of the braids.  Ensure you rinse thoroughly and squeeze gently..  A towel or t-shirt can be wrapped on you head to absorb the water.   Ensure the weave/braids and your hair dries fully.


Option 2: Leave in conditioning sprays
An alternative method of conditioning is to use a liquid leave in conditioning spray.  These are usually very light and do not leave too much product residue on the hair. This is the method I used when I wore weaves and braids in the past.
The spray should be aimed at the tracks of the weave because this is where your own hair is.  For braids, the length and base can be sprayed lightly.  Ensure your hair and the extensions dries fully.

Please see the picture below showing examples of leave in moisturising sprays.  The product in the middle is a detangler but this particular detangler is also a fantastic hair mist that I highly recommend.  Please note that the product to the right (CHI) is a protein product so should not be used excessively.
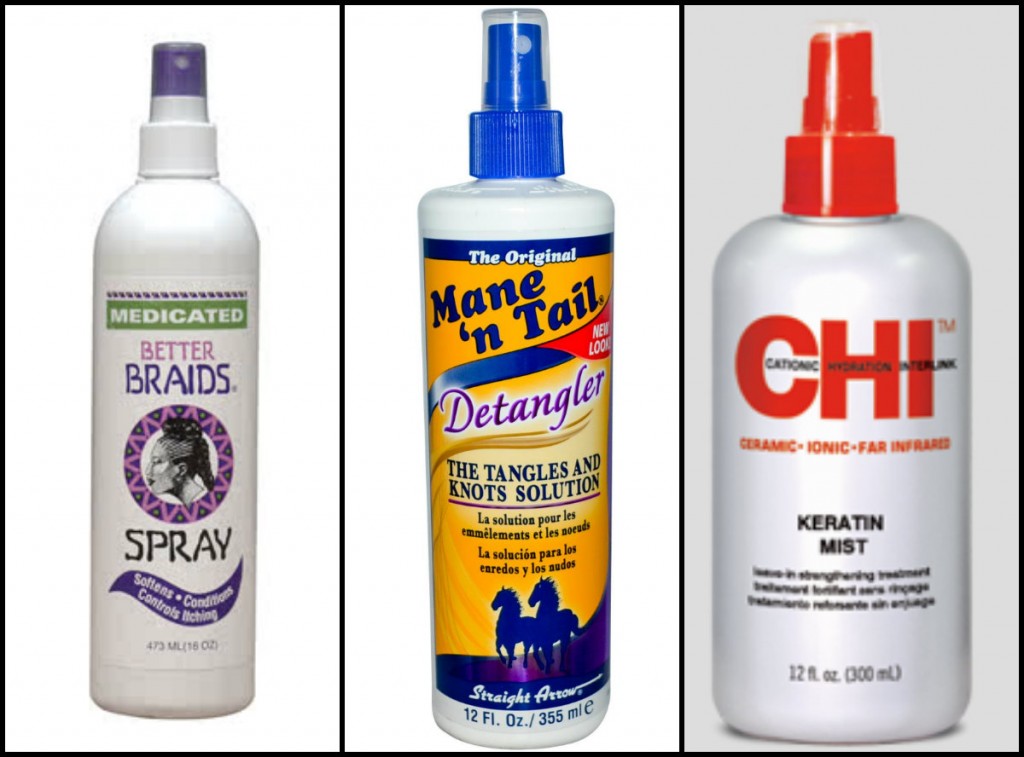
Braid Sprays

MOISTURISING AND SEALING

Moisturising
A moisturising spray can be used to hydrate the tracks of the weave or the braids.
The spray can be used three or four times a week, do not over saturate the hair, just a light misting to prevent chronic dryness. The use of moisturising creams and lotions is not ideal because they can leave a lot of residue on your hair.  Product residue may cause matting because you may not be able to cleanse your hair thoroughly due to restricted access.

Sealing
A light oil such as coconut oil or jojoba oil can be applied to the scalp and massaged in.  Massaging the scalp regularly will encourage blood flow to the hair follicles and helps to keep the scalp pliable.  This may be done once or twice a week.  A very small amount of oil should be used to prevent the oil running into the weave hair making it look stringy and greasy.

OTHER USEFUL INFORMATION

1) I would suggest that you keep your weave/braids in for one month minimum and two to three months maximum.
There is a lot of manipulation involved in creating a weave and getting new weave/braids put in every two/three weeks will be very strenuous on your hair.  Leaving the extensions in for over two to three months may lead to your hair matting within the braids or underneath the weave.  Matted hair is very difficult to untangle and will likely lead to breakage.

2) For weaves, if you have left some of your hair to blend with your weave, try to continue your regular regimen on the hair that has been left out. Try to wash and condition the hair left out once a week.


I know!!!!!!!!!
This blog post has been quite long but I do hope you have found it to be a worthwhile read.

Please stay tuned for the third and final part of this series in which I will share what should be done to your hair after removing extensions.  This will also include the highly demanded how to wash your hair in braids/calabar guide.

Till then I hope you Learn | Change | Grow

x

Lade